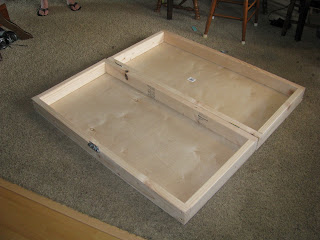
Step by step instructions
- Buy the hardware and lumber. Here's what we used:
- Three (3) 2"x4"x8' untreated boards
- Two (2) 2'x4' 15/32" thick plywood boards (probably overkill)
- One (1) 4" barrel bolt (use any latch that you like) and included screws
- Two (2) 2.5" hinges and included screws
- A bunch of #8 2.375" self-tapping drywall screws (approximately 24)
- Sandpaper (eventually)
- Padding (store bought dog bed)
- Saw down the 2x4 boards to four 4' lengths and four 21" lengths. This leaves a little chunk to use if you wish to raise the bed.
- Drill pilot holes on the 4' boards. You need two holes approximately 0.75" in from the end of the board on each side. These two holes should be approximately 0.75" from the other edge of the board
- Attach a 4' board to a 21" board as seen above.
- Attach a 21" board to the other end (you will have a c-shaped wood frame)
- Attach a second 4' board to the other end to finish off the frame.
- Align the plywood with the frame and tack down the corners with the dry wall screws.
- Secure it with screws in the middle of all four sides (halfway between the corner screws).
- Repeat steps 4-8 to make other side.
- Stand them up with plywood side facing out and place hinges where you want them. Make sure the hinge itself is centered so it will open and close freely.
- Flip it over (you may need someone to help you hold it for this step) and attach the latch you chose to use. For ours we used a 4" barrel bolt. We only put screws in one side of the bolt and then the other side of the latch for the barrel bolt (so the screws were on opposite sides).
- Finish it off how you like! We are going to sand the edges down a bit and soak them with bitters so they don't get chewed up too badly!
-K & B


No comments:
Post a Comment